Per allargare la velocità di informazione riguardo le partite HITS organizzate su Kriegs ho creato un gruppo google funzionante come mailing list; quindi se siete interessati a giocare o a conoscere quando si gioca HITS a Scourge potete iscrivervi qui:
https://groups.google.com/forum/#!forum/scourge-of-war-multiplayer-hits
Ovviamente nessun impegno a giocare a cadenze fisse, è solo uno strumento di informazione per chi è potenzialmente interessato a conoscere le date delle partite di Kriegsspiel.
sabato 8 marzo 2014
HistWar : Austerlitz
JMM cerca di far passare il suo gioco su Steam, mettendo su Greenlight il primo di una serie di moduli (non è ben chiaro il rapporto con il gioco originale) che dovrebbero contenere le battaglie delle varie campagne, il primo è Austerlitz.
http://steamcommunity.com/sharedfiles/filedetails/?id=230506942
Non si capisce in che rapporto dovrebbe essere con HistWar: Napoleon o in che cosa si dovrebbe differenziare a parte le battaglie.
http://steamcommunity.com/sharedfiles/filedetails/?id=230506942
Non si capisce in che rapporto dovrebbe essere con HistWar: Napoleon o in che cosa si dovrebbe differenziare a parte le battaglie.
giovedì 6 marzo 2014
Piercing Fortress Europa Gustav Line AAR
Sul forum Matrix trovate un AAR fatto con Piercing Fortress Europa, una delle ultime uscite Matrix
http://www.matrixgames.com/forums/tm.asp?m=3557299
http://www.matrixgames.com/forums/tm.asp?m=3557299
lunedì 3 marzo 2014
Ultimate General Gettysburg Promo
Ne avevo parlato qualche tempo fa come il lavoro autonomo di Darth il famoso modder dei Total Wars.
Adesso è su Steam Greenlight (segnalato su Realtime Strategy):
Adesso è su Steam Greenlight (segnalato su Realtime Strategy):
domenica 2 marzo 2014
What If Gettysburg - battaglia multi in fasi parte 1
Ieri abbiamo giocato la prima parte di una battaglia multi in fasi: in fasi perchè dopo una session di due ore, le posizioni e le perdite saranno riportate nello scontro successivo, come parte dello stesso scontro, e gli obbiettivi presi e persi determineranno gli eventi delle varie fasi.
Lo scontro è stata una sonora batosta tattica per noi confederati con pedite quasi tre volte quelle nordiste, ma abbiamo comunque raggiunto degli obbiettivi importanti mentre i federali anno perso di vista la visione più ampia, per cui la battaglia della prossima volta sarà influenzata da tutto ciò.
Ecco il replay:
"
The engagement at Gettysburg became a full scale battle and the confederates received a hard tactical defeat, but the night comes to separate the troops and the stop the fighting. Longstreet Corps has been forced to a desparate defence but now the Northern troops of VI Corps in their hurry to press ahead resulted cutted from their line of communication with rest of army and still the flank at west is not fully secured against the enemy cavalry; they ended in a "cul de sac" where they are sufficiently strong to move but only in a direction. During the night the commanders took their decisions about what do the day after. The biggest Corps of Army fo Potomac is for the moment isolated from the rest of army also if only by light screen of enemy troops but also few hours could permit to Jackson Corps to make a flank attack on the right wing of army at Hanover; at the same time the confederate retreat line at South is in danger and if lost the confederate could retreat only to east to Hanover but this only if they can hold a sufficient number of hours for permit Jackson to advance. In the meantime the western reinforcements are advancing.
"
Ed ecco un po' di commenti dal forum di kriegspiel:
"
It was a very fluid and interesting battle, one of the few that involved Culps Hill but no maniac battle for it. The action my division saw on Cemetery Hill was a real whirlwind fight, and fortunately I was able to push the Rebs back to the South-West without much difficulty after Martin's (Buford's) cavalry had weakened them a lot. We did almost lose the hill in the second Reb assault but one of the other Union divisions (I am not sure if it was Josh or Blackstreet) managed to threaten the west side from the town and we secured it. Jeb Stuart's cavalry was a constant nuisance on the western and north-western flanks and our plan to push Buford from his early lodgement on Cemetery Hill out to the north-west to secure the other objectives never even materialised.
After the Reb attack from Culps Hill towards the south-east flank of the cemetery was beaten back my division was down from 12 battalions to 6 but I made up for it by capturing a few Confederate guns. The weight of Union artillery atop Cemetery Hill must have lowered the summit by a couple of feet!
I fear that the Rebs paid more attention to the overall strategic objectives though and that the next day's fight will be harder for the Union.
"
"
The original Union plan was for the cavalry to push ahead and secure the high ground S of G/burg. When the infantry arrived it was to relieve the cavalry and then advance S and take up a defensive position between the Leister and Spangler Farms. The cavalry was then to move towards the SW to screen the objectives in the NW portion of the map.
I initially commanded the cavalry division, and our leading brigade was arriving on Cemetery Hill when two things happened. Our CinC had to leave the game and passed command to me, and Rebel infantry appeared and advanced against both the unoccupied Culp’s Hill and our position on Cemetery Hill. At a personal level, I confess this combination almost overwhelmed me. I was simultaneously trying to defend the hill and also work out where the rest of the army was. [I’m sure there is a headless chicken emoticon somewhere]
The struggle for Cemetery Hill was desperate and I thought we were about to be pushed off it. Infantry of our 1st division arrived in the nick of time, but the enemy continued to advance, and in desperation I ordered the cavalry to charge. We weathered that storm, but later on there was a further major enemy attack which reached our gun-line. The cavalry charged again, and that worked, perhaps because the Reb infantry was weakened by our artillery fire on their approach? In all honesty I’m not sure it should have done. It seemed more Napoleonic than ACW. Could Buford’s men have done that at G/burg in reality?
The question of the objectives was the subject of discussion amongst the Union team during the game. At various times all 3 of my subordinates raised concerns about enemy threats to Culp’s Hill, Herr’s Tavern, The Hagerstown Road, and our LOC back to the NE of G/burg. Rightly or wrongly I took the view that we should focus all our efforts on defeating the enemy forces attacking Cemetery Hill, and constantly pushed the divisional commanders to keep focused on that sector. I felt that we did not have the strength to both defeat the enemy and simultaneously control all of the objectives. If we won the battle, I thought we could retake any of the objectives which had been lost. This tension, which was no doubt intentional, was one of the reasons why this was a good scenario.
Eventually the tide turned on Cemetery Hill, and we were able to go on the offensive. The enemy appeared to hold a strong position on Culp’s Hill, so we decided to ignore that. Our relatively fresh 2nd Division launched an attack to the south which penetrated the Confederate centre. The cavalry was by now largely rested, and one brigade was directed to reinforce our 3rd Division in their thrust west towards Herr Tavern. The other 2 bgds were directed S towards the Confederate LOC on the southern edge of the map. By this point, it appeared that the enemy to the S and W of us had shot its bolt and fell back whenever we advanced. At this point dusk fell however.
I would like to thank all of the divisional commanders for an excellent team effort, after a somewhat chaotic start. Our 1st Division (Digby) worked valiantly with the cavalry to defend the hill. The 2nd Division (Josh) initially helped cover our eastern flank facing Culp’s Hill, and their late game advance split the Reb army in two. Our 3rd Division (Ollie) both countered the enemy cavalry on our western flank, and also helped turn the tide on Cemetery Hill.
"
"
This is a good point Martin, yes there was to make a choice and think this is the good of sequential battles. You're idea work pretty well, but of course after have broke me and Berthier you had the resources and the time for protect also the objectives. Pressing ahead like this leaved two middle strong forces on your both flanks creating a not happy form of your area for the next day deployment. If Richard won't dropped the situation on the ohter flanks could be worse for you also if not in decisive mode.
So also the next time there will be to do choices, also if those of confederate are harder.
Paradoxily if I moved slower it should be better, if I found the hill not so undefended I would have remained on the defensive according to the Neal orders. But unluckily I have also undervalueted the distance between mine and the other divisions and so Berthier joined me later than I expected when I asked his support.
I think the cavalry charges won mainly because the attacked regiments are not strong as number of men; cavalry has a bonus in melee but the number of men count also.
"
mercoledì 26 febbraio 2014
Hegemony Rome - Rise of Caesar video preview
Preview video di Hegemony Rome - Rise of Caesar; ricordo che il gioco è in beta a pagamento su Steam.
Rilasciati Piercing Fortress Europa e Mark H. Walker's Lock 'n Load: Heroes of Stalingrad rilasciati
Rilasciati da Matrix due wargame 2d classici Piercing Fortress Europa e Mark H. Walker's Lock 'n Load: Heroes of Stalingrad. Lock 'n Load mi interessa poco, farò un pensierino per Piercing Fortress Europa, ma prima aspetto di avere infor più precise su com'è.
http://www.matrixgames.com/products/467/details/Piercing.Fortress.Europa
http://www.matrixgames.com/products/349/details/Mark.H..Walker's.Lock.'n.Load:.Heroes.of.Stalingrad
http://www.matrixgames.com/products/467/details/Piercing.Fortress.Europa
http://www.matrixgames.com/products/349/details/Mark.H..Walker's.Lock.'n.Load:.Heroes.of.Stalingrad
martedì 25 febbraio 2014
Presentazione della beta d’Histwar : Napoléon
Video presentazione in francese di Histwar : Napoléon; il gioco è stato attivato per l'approvazione in Steam Greenlight.
Battaglia Scourge Napoleonico Sabato 22 Febbraio
Resoconto di Flavia della battaglia a Scourge Napoleonico di Sabato:
http://www.netwargamingitalia.net/forum/threads/scourge-of-war-hits-gameplay.24342/page-5#post-356866
http://www.netwargamingitalia.net/forum/threads/scourge-of-war-hits-gameplay.24342/page-5#post-356911
Qui trovate i video in prima persona della battaglia di venerdì e sabato
http://www.netwargamingitalia.net/forum/threads/scourge-of-war-hits-gameplay.24342/page-5#post-356866
http://www.netwargamingitalia.net/forum/threads/scourge-of-war-hits-gameplay.24342/page-5#post-356911
Qui trovate i video in prima persona della battaglia di venerdì e sabato
sabato 22 febbraio 2014
Scourge of War battaglia ITS 21.02.2014
Ieri sera abbiamo inaugurato la serata scenari nelle nostre battaglie HITS. é stato deciso che almeno uno degli incontri settimanali sarà fatto con uno scenario e durante la settimana ci sarà un briefing con i due comandanti in capo che avranno le informazioni e il tempo necessario per preparare i piani. Ieri abbiamo giocato un uno scenario pensato per il single e quindi un po' sbilanciato quando la fazione nordista è nella mani di giocatori umani, ma chi l'ha detto che la guerra deve essere corretta?
Comunque eravamo 8 giocatori (4 per parte). Questo era il briefing nordista:


Comunque eravamo 8 giocatori (4 per parte). Questo era il briefing nordista:
Situation
It is 4 pm on 29th September 1864.
After heavy fighting in recent weeks,
Richard Taylor's Confederate corps is resting and refitting. The troops are believed to have been
dispersed to take advantage of supply and accommodation in nearby farms.
Your Union corps landed from the
Mississippi 36 hours ago, about 15 miles to the N of the map, and you have
since marched SW. You have not
encountered any Rebel patrols, so believe that your movement has not been
detected.
Taylor's corps is believed to consist of a
Louisiana infantry division under Mouton, a Texas infantry division under
Walker, plus a cavalry division under Wharton.
It's strength is uncertain, but is thought to be weak, after recent
fighting.
Your objective is to defeat Taylor, and in
particular to seize his supply base and hospitals in the SE portion of the map. Speed would be good, as otherwise Taylor may
be reinforced. Dusk is at 6 pm, or
shortly thereafter.
A J
Smith's Corps summary OOB
Mower's 1st Division
|
2 infantry brigades, 2 batteries
|
3,019 men
|
Emory's 2nd Division
|
3 infantry brigades, 2 batteries
|
4,064 men
|
Landram's 3rd Division
|
2 infantry brigades, 1 cavalry brigade, 2 batteries
|
5,133 men
|
A
note on cavalry
Cavalry in this theatre is trained and
equipped to fight as infantry. It has
actually become reasonably good at this, and can normally stand its ground
against infantry for some time. The
Confederate cavalry is somewhat more effective in this role than the Union
cavalry. Conversely, it will be
difficult to get cavalry to charge anything other than guns or wagons, as most
of the men have not been issued with sabres.
Mentre questo era il nostro (sudisti ovviamente):
Situation
It is 4 pm on 29th September 1864.
After
heavy fighting in recent weeks, Richard Taylor's Confederate corps is resting
and refitting. The 3 divisions have been
dispersed to take advantage of supply and accommodation in nearby farms.
Today is General Taylor's birthday, and his
divisional commanders have gathered at his HQ to celebrate, and present him
with a ceremonial crumpet baked in his honour by the good ladies of Western
Louisiana.
However festivities are rudely interrupted
by the arrival of a courier from Taylor's superior, with the news that A J
Smith's Union corps landed from the Mississippi 36 hours ago, about 15 miles to
the N of Wharton's Division. Its
strength and composition is uncertain, but is thought to outnumber us. Intelligence suggests that its objective is
probably our supply base and hospitals in the SE portion of the map.
Taylor immediately telegraphed for
reinforcements, and a strong division of 7,500 men is marching to us overnight
and should arrive by morning. It is only
necessary that we hold for a couple of hours until dusk at 6 pm, or shortly
thereafter.
Taylor's
Corps summary OOB
Mouton's Division
|
2 infantry brigades, 2 batteries
|
2,881 men
|
Walker's Division
|
2 infantry brigades, 1 battery
|
2,966 men
|
Wharton's Cavalry Division
|
2 cavalry brigades, 1 battery
|
2,165 men
|
A
note on cavalry
Cavalry in this theatre is trained and
equipped to fight as infantry. It has
actually become reasonably good at this, and can normally stand its ground
against infantry for some time. The
Confederate cavalry is somewhat more effective in this role than the Union
cavalry. Conversely, it will be
difficult to get cavalry to charge anything other than guns or wagons, as most
of the men have not been issued with sabres.
Come si può capire la situazione alla partenza per noi sembrava davvero diversa dalla realtà per cui puntavo a farci concentrare alla fattoria Rummel per poi muoverci nella direzione corretta. Invece Berthier si è trovato subito nella situazione peggiore, praticamente con il nemico addosso e pronto ad accerchiarlo. Abilmente si è svincolato mentre io cercavo di montare un attacco diversivo: purtroppo causa problemi tecnici con il mio corriere Martin ha continuato verso Rummel invece di andare più a sud per cui è perso tempo, mentre la cavalleria che doveva eseguire un attacco diversivo, ha preso troppo alla lettera la parola "attacco alla spalle" attaccando la coda dell'esercito invece che le spalle delle truppe marcianti contro Berto, anche se l'azione ha fermato un'intera divisione nemica.
Comunque Berto è riuscito ha formare una linea di difesa meridionale e alla fine Martin ha ingaggiato il fianco nemico infliggendo dei danni seri e imprevisti al nemico che non si aspettava un contrattacco. Mentre io cercavo di richiamare la cavalleria il prima possibile.
Alla fine è apparso evidente che la loro manovra puntava a sfruttare la superiorità numerica e il fatto di avere la cavalleria a sud per bypassare la nostra linea e raggiunger l'obbiettivo, ed in effetti alla fine ci sono riusciti con la cavalleria, nonostante la nostra marcia disperata all'indietro per bloccare tutte le loro puntate. Alla fine ci siamo raggruppati e con una marcia sul fianco della cavalleria siamo comunque riusciti a mantenere la via di uscita verso la mappa sgombra anche se con severe perdite.
Alla fine nonostante la sconfitta è stata davvero una battaglia divertente e molto manovrata, una di quelle che ti fanno apprezzare il gioco.
venerdì 21 febbraio 2014
Flashpoint Campaigns: Red Storm patch 2.03 rilasciata
Rilasciata la nuova patch 2.03 per Flashpoint Campaigns: Red Storm.
The 2.03 update fixes some pesky bugs spotted by the community, and introduces major gameplay improvements such as refinements of the overall combat system and enhancements for urban warfare tactics. A seven scenario campaign called “School Teacher” has also been added and features a tough fight between the Soviet army and the West German forces
The 2.03 update fixes some pesky bugs spotted by the community, and introduces major gameplay improvements such as refinements of the overall combat system and enhancements for urban warfare tactics. A seven scenario campaign called “School Teacher” has also been added and features a tough fight between the Soviet army and the West German forces
La potete scaricare tramite il tool di aggiornamento automatico.
Nuovi video per CM Red Thunder
Su questo canale trovate dei video di gameplay fatti con Combat Mission Red Thunder:
https://www.youtube.com/user/NormalDude1066
https://www.youtube.com/user/NormalDude1066
martedì 18 febbraio 2014
Arma 3 Zeus
La Bohemian ha svelato la prossima DLC per Arma 3, si tratta di Zeus che introdurrà una forma di multiplayer "gestito dall'alto".
Ecco il trailer:
http://zeus.arma3.com
Ecco il trailer:
http://zeus.arma3.com
domenica 16 febbraio 2014
Consiglio letterario: i quattro volumi di Gordon Rhea sulla Overland Campaign
Sto leggendo i quattro libri (un quinto deve ancora uscire) di Gordon Rhea sulla Overland Campaign (la campagna di Grant in Virginia del 1864 che portò all'inizio dell'assedio di Petersburg). Ogni volume si compone della quattro battaglie chiave (Wilderness, Spotsylvania, North Anna River e Cold Harbor) e delle azioni nel mezzo tra le due. Sono in tutto e per tutto ottimi libri di storia militare vecchio stile, molto dettagliati ma anche con lo stile fluido della narrativa. Forse qualche mappa in più ci stava bene, ma comunque quelle presenti fanno bene il loro lavoro. Insomma li suggerisco senz'altro a chi volesse approfondire l'argomento.
Civil War II patch 1.03
Uscita la nuova patch per Ageod's Civil War II. La patch può essere scaricata qui:
http://bit.ly/1guHffX oppure tramite l'updater automatico
Qui il change log:
Gameplay / Game Logic (improvements & fixes)
Development level reduction done by regional decisions was not working.
Land mine decision can now affect cities, not only forts.
Messages on decisions with tests and conditions reworked so they are easier to understand when not successful.
Ability sending command points modifier to subordinate stacks had a bug resulting in double modifiers sometime.
New option added in Menu\Options to play with ‘hidden activation’.
Database
Some abilities icons fixed.
* Added models and units for new flavor unit (USA Flotilla Bde.)
* Changed Mussel Shoals to forbid navigation up the Tennessee past the river region
Interface
Combat Power indicated on each map counter will be the sum of all combat powers of all stacks of the region.
Combat Power and the 3 gauges (hits, cohesion, Supply) only appear on enemy counters if there is at least 2 extra detection points toward the enemy stack.
Replay feature makes a comeback (experimental support!). If your current turn has a replay, then invoke the console and type loadreplay. Once the console has finished loading, you can hit space to start/pause/resume replay or hit escape to abort it.
Historical setting and events
Additional flavor units added at historical time: Cable Brigade, Texas Greyhounds, Waul Legion, Iron Cavalry Bde, Thomas’ Legion.
Sioux uprising event improved.
Fixed missing images (Kentucky)
Fixed texts (e.g. Virginia commissioned)
Added events for new Flavor Bde.
AI
AI has been improved on sending supply wagons and artilleries.
AI has been improved on resupplying algorithm.
Game Balance
Several tweaks for CSA and USA.
Things that would benefit CSA:
1) Add one more CSA draft card each year. They would receive 4 to current Union 8 cards (1:2 ratios).
2) Add 2 more cotton warehouses to the CSA, for a total of 5 (New Orleans, Charleston, Savannah, Mobile, Wilmington).
3) Add 4 barracks (New Orleans San Antonio, Macon, and Raleigh).
4) Add 6 VP to CSA production by increasing Objective value of New Orleans, Charleston, Savannah and Mobile.
5) Double troops from mobilization options
6) Increase money options yield from 400 to 600$
Things that would benefit US:
1) Raise the tax and bonds yield from 400 to 800$.
2) Add additional +15 FI bonuses for Emancipation proclamation.
3) Add Event creating 10 vol. brigades to Washington, and 5 vol. brigades to Alexandria in Nov, 61. Have them unlocked after 60 turns (2.5 years).
4) Add 6 barracks (Chicago, Detroit, Cleveland, Buffalo, Pittsburg, and Philadelphia).
5) Double troops from mobilization options.
mercoledì 12 febbraio 2014
Arma 3 Community Guide: Air Assault
Nuovo video della comunità di Arma 3; si parla di assalto aereo:
domenica 9 febbraio 2014
Scourge of War HITS battaglia 08.02.2014
Ieri grossa battaglia 3vs3 a Scourge of War HITS, circa 29.000 in campo e un obbiettivo. Noi facciamo i nordisti. Partiamo subito male per un mio errore di comunicazione, mando Berthier sull'obbiettivo con un'avanguardia di cavalleria, ma sbaglio a dire a Flavia la direzione, voglio che vada a destra dell'obbiettivo a sud, ma mi dimentico di dire che intendo la destra rispetto al nostro punto di vista, non la destra assoluta rispetto alla mappa, per cui mi accorgo tardi che si sta allontanando da noi verso est (un bosco ci separava nella zona di schieramento iniziale), e peggio ancora cozza subito contro le truppe avversarie che marciano invece verso nord (mi sono appuntato che per la prossima volta, smetterò di usare il testo scritto, manderò i punti geografici solo tramite la funzionalità grafica standard; non la usavo fino a questo momento perchè se il giocatore non guarda la mappa con il suo ufficiale settato non vede la posizione richiesta e questo da adito ad errori se il giocatore non lo sa, ma c'è troppa possibilità di errore con il testo scritto). Come potete vedere dal video il risultato è che la divisione AI che doveva formare la nostra sinistra e limitarsi a contenere le truppe, mentre Flavia e Alberto attaccavano il fianco sinistro nemico, deve lottare disperatamente per evitare di perdere il contatto con Flavia, che manovrava per sganciarsi e raggiungerci, dato che il nemico è fortemente sbilanciato verso nord, cosa che sarebbe stata ottima nel piano iniziale, ma pessima nella situazione in cui eravamo.
Comunque sia lo sganciamento e il ricongiungimento alla fine sono comunque riusciti pur nella difficile situazione anche se al costo di quasi tutta l'artiglieria e qualche reggimento e Berthier a sud riesce a tenere e anche contrattaccare. Alla fine comunque ci chiudiamo in una difesa a riccio tenace di circa 2 ore e mezzo, e anche se numericamente siamo di più, le truppe confederate sono migliori e hanno parecchia artiglieria per cui alla fine ammettiamo la sconfitta, quando ormai è evidente che le nostre truppe non reggono più.
Comunque sia lo sganciamento e il ricongiungimento alla fine sono comunque riusciti pur nella difficile situazione anche se al costo di quasi tutta l'artiglieria e qualche reggimento e Berthier a sud riesce a tenere e anche contrattaccare. Alla fine comunque ci chiudiamo in una difesa a riccio tenace di circa 2 ore e mezzo, e anche se numericamente siamo di più, le truppe confederate sono migliori e hanno parecchia artiglieria per cui alla fine ammettiamo la sconfitta, quando ormai è evidente che le nostre truppe non reggono più.
venerdì 7 febbraio 2014
Command: Modern Air/Naval Operation articolo su Netwargaming Italia
Su NetWargaming Italia trovate un dettagliatissimo articolo su Command: Modern Air/Naval Operation, uno dei due più recenti monster games della Matrix, e successore ideale di Harpoon.
http://www.netwargamingitalia.net/2014/recensione/command-modern-airnaval-operation/
http://www.netwargamingitalia.net/2014/recensione/command-modern-airnaval-operation/
giovedì 6 febbraio 2014
Rilasciato CIVIL WAR II THE BLOODY ROAD
La prima DLC per Civil War II è stato rilasciata dalla Ageod, ecco la pagina del prodotto:
http://matrixgames.com/products/526/details/Civil.War.II.The.Bloody.Road.South
http://matrixgames.com/products/526/details/Civil.War.II.The.Bloody.Road.South
mercoledì 5 febbraio 2014
Hegemony Rome: The Rise of Caesar dal 12 Febbraio in Early Access su Steam
Hegemony Rome: The Rise of Caesar seguito di Hegemony Wars in the Ancient Greece, sarà disponibile in early access (una sorta di beta) su Steam dal 12 Febbraio a prezzo scontato. Se vale anche solo come il suo originale, allora è un gioco che vale. Anche se sembra un gioco semplice ha una profondità che trovate solo in wargames più che negli RTS.
domenica 2 febbraio 2014
Scourge of War Battaglia 01/02/104
Altra bella battaglia a Scourge in modalità HITS, stavolta eravamo 10 giocatori, 5 per parte. Noi eravamo i sudisti e io ero al comando di una divisione texana, non certo al suo meglio e con dei fucili che se erano ad acqua erano meglio. Insomma per tutta la partita davo sotto di baionetta come se non ci fosse un domani, perchè negli scontri a fuoco facevo schifo.
Il contesto era: i nordisti stanno avanzando verso ovest da est, noi siamo in inferiorità ma una divisione AI di rinforzo sta arrivando da sud, quindi in teoria avremmo dovuto difenderci in inferiorità per un po'. Alla partenza vado con la mia divisione in avanscoperta verso il Lutheran Seminary, ma appena arrivo mi trovo di fronte una valanga di giubbe blue e taglio la corda. Faccio un po' di scena mettendo in piedi differenti linee difensive mentre arretro, ma non è che rimanga sotto pressione, a parte l'artiglieria i nordisti non si muovono. Comunque tutto questo permette alla divisione AI di arrivare e alle altre divisioni di formare una linea di difesa; la mia divisione, che ha già sofferto non poco, per il fuoco di quattro batterie, viene messa in riserva in seconda linea.
La prima azione di attacco avviene a nord, dove una brigata nordista cerca il colpaccio, aggirandoci, ma non è supportato, quindi viene tagliata fuori e contrattaccata dalle mie due brigate, mosse in fretta verso nord e da un'altra, e mandata in rotta. A questo punto l'azione inizia anche sugli altri fronti, al cnetro avanza una brigata nordista e a sud inizia un balletto di mosse non decisive; ma dal replay appare evidente che chi teneva il centro-sud per reagire ad una singola brigata ci ha lasciato un bel buco nello schieramento.
Nel frattempo a nord, attacchiamo i nordisti, che nel frattempo erano avanzati sul fianco e li ributtiamo indietro, e a questo punto io mi muovo verso il centro, dove nel frattempo si era ammassata una forte divisione unionista, con una brigata e poi con l'altra ed inizio un balletto di cariche e controcariche, canister e batterie perse, finchè con l'arrivo di rinforzi la ributtiamo oltre il fiume, ma ormai è tardi per aiutare il fianco meridionale che è stato spinto parecchio a sud del nostro schieramento e la partita termina con noi, in buona condizione a nord, ma completamento disorganizzati a sud, e con perdite decisamente elevate rispetto al nemico (5000 contro 3000).
venerdì 31 gennaio 2014
Annunciato Combat Mission: Red Thunder
Finalmente si conosce il nome finale del nuovo Combat Mission ambientato sul fronte orientale: come già supposto da molti, ci sono i lanciafiamme!
Red Thunder (nome non certo originale) promette di essere un bel salto in avanti rispetto ai predecessori, che si spera verranno adeguati allo stesso standard con la patch 3.0.
Qui il link con tutte le informazioni:
http://www.battlefront.com/index.php?option=com_content&task=blogcategory&id=330&Itemid=567
mercoledì 29 gennaio 2014
Civil War 2 The Bloody Road South
L'Ageod ha annunciato una dlc per Civil War 2, The Bloody Road South.
Ecco l'elenco del contenuto:
Battle Scenarios
1863 – Thunder at the Crossroads (June-July 1863, Battle of Gettysburg)
1864 – Make Georgia Howl (July-October 1864, Battle of Atlanta)
One Theater Annual Campaign Scenarios
1862 – Eastern Theater
1862 – Western Theater
Grand Campaigns with all Theater Scenarios, later starts
1862-1865 – Struggle for the Heartland
1863-1865 – Triumph & Defeat
1864-1865 – Bloody Roads South
Annunciato Crusader Kings II: Rajas of India
Una nuova DLC per Crusader Kings II è stata annunciata dalla Paradox: Rajas of India. Dal nome già si capisce che la mappa sarà ampliata per includere l'India.
Dust off your jewelled turban and defend dharma as a mighty Indian Raja, conquering in the name of Indra! Raise war elephant units and fight in the dense jungle terrain. Make Siddhartha proud as a Buddhist and advance your technology or maintain a harmonious stable realm as a Jain. Raid your neighbors as a warlike Hindu of the Kshatriya caste!
Crusader Kings II: Rajas of India introduces a wealth of new cultural and religious events that would appease even the ferocious goddess Kali, including meeting yogis and sadhus, celebrating Diwali and thinking about your reincarnation. Be careful, the Wheel of Life keeps on turning and those karmic forces can be equally cruel!
With all eyes on Hindustan, the map has been extended far to the east to encompass hundreds of new provinces in Central Asia as well as opening up the ports of The Red Sea and Indian Ocean for navigation by your fleets.
L'uscita della DLC è prevista per questa primavera.
L'uscita della DLC è prevista per questa primavera.
lunedì 27 gennaio 2014
Stronghold Crusader 2 sarà rilasciato questa estate
http://www.strongholdcrusader2.com/
Releasing in the summer is a little later than we had initially hoped, but once again our intention is to release a game that lives up to the Crusader name. Whenever we meet someone who played and enjoyed the original they always have a story to tell about the time they finally beat that hard as nails Crusader Trail mission or when they took on seven AI opponents at once! When people have such fond memories you can’t rush a sequel out the door, which is why we have chosen to take our time when it comes to feature implementation and play testing. We’re at a point now where we can dip into skirmish mode or a multiplayer game during lunch and have fun, which is a fantastic feeling for the team.
With the game in its current state we can spend extra time tuning and tweaking the various new units and siege equipment that will soon be storming other players online. It will also mean we have enough time to reduce the number of bugs and crashes right down before launch and refine the core gameplay loops that make it fun. We know players are eager to get their hands on the game, but Crusader 2 must be fun, stable and complete at launch.
Europa Universalis IV: Wealth of Nations
Annunciata la nuova DLC per EU IV, Wealth of Nations.
La nuova DLC dovrebbe avere le seguenti features:
La nuova DLC dovrebbe avere le seguenti features:
- The Invisible Hand of the Market: You can act covertly to instigate trade conflicts among the competition, stifling income and leaving yourself atop the economic heap.
- Seize the Seas: Hiring privateers can damage enemy shipments and cripple their trade, but risks retaliation in the form of open warfare if you are caught.
- Capitalize: Empires can designate a specific port as their trade capital, separate from their national capital, and strengthen local trade routes through the use of inland trade nodes.
- Monopolize and Mobilize: Form an East India Company and reach faraway trade partners with an unstoppable shipping concern.
La data di rilascio è prevista per la seconda metà dell'anno.
venerdì 24 gennaio 2014
Piercing Fortress Europa intervista a Frank Hunter
Su The Wargamer trovate un'intervista a Frank Hunter, sviluppatore di Piercing Fortress Europa, wargame di prossimo rilascio.
http://www.wargamer.com/article/3510/interview-piercing-fortress-europa
http://www.wargamer.com/article/3510/interview-piercing-fortress-europa
Annunciato Hearts of Iron IV
E' stato annunciato Hearts of Iron IV con un primo trailer di annuncio:
Del contenuto si sa ancora poco, ma è previsto per il 2015
Del contenuto si sa ancora poco, ma è previsto per il 2015
mercoledì 22 gennaio 2014
EU IV – Conquest of Paradise articolo sul nuovo sistema di gestione delle colonie
Su La Gazette du Wargamer c'è un articolo sulla nuova gestione delle colonie nella nuova DLC Conquest of Paradise.
http://www.wargamer.fr/eu-iv-conquest-of-paradise-le-nouveau-systeme-de-gestion-des-colonies/
http://www.wargamer.fr/eu-iv-conquest-of-paradise-le-nouveau-systeme-de-gestion-des-colonies/
Sconti permanenti Matrix
La Matrix Games ha attuato una politica di riduzione prezzi permanente su alcuni prodotti del suo catalogo.
Ecco l'elenco dei prodotti scontati:
http://www.slithdata.net/files/news/MG_MG_SALES_PermamentReduction_List.pdf
Ecco l'elenco dei prodotti scontati:
http://www.slithdata.net/files/news/MG_MG_SALES_PermamentReduction_List.pdf
martedì 21 gennaio 2014
Disponibile demo di Germany at War – Barbarossa 1941
Sul sito Matrix è disponibile la demo di Germany at War – Barbarossa 1941.
Ecco il link:
http://matrixgames.com/products/472/links/Germany.at.War:.Barbarossa.1941

Ecco il link:
http://matrixgames.com/products/472/links/Germany.at.War:.Barbarossa.1941
lunedì 20 gennaio 2014
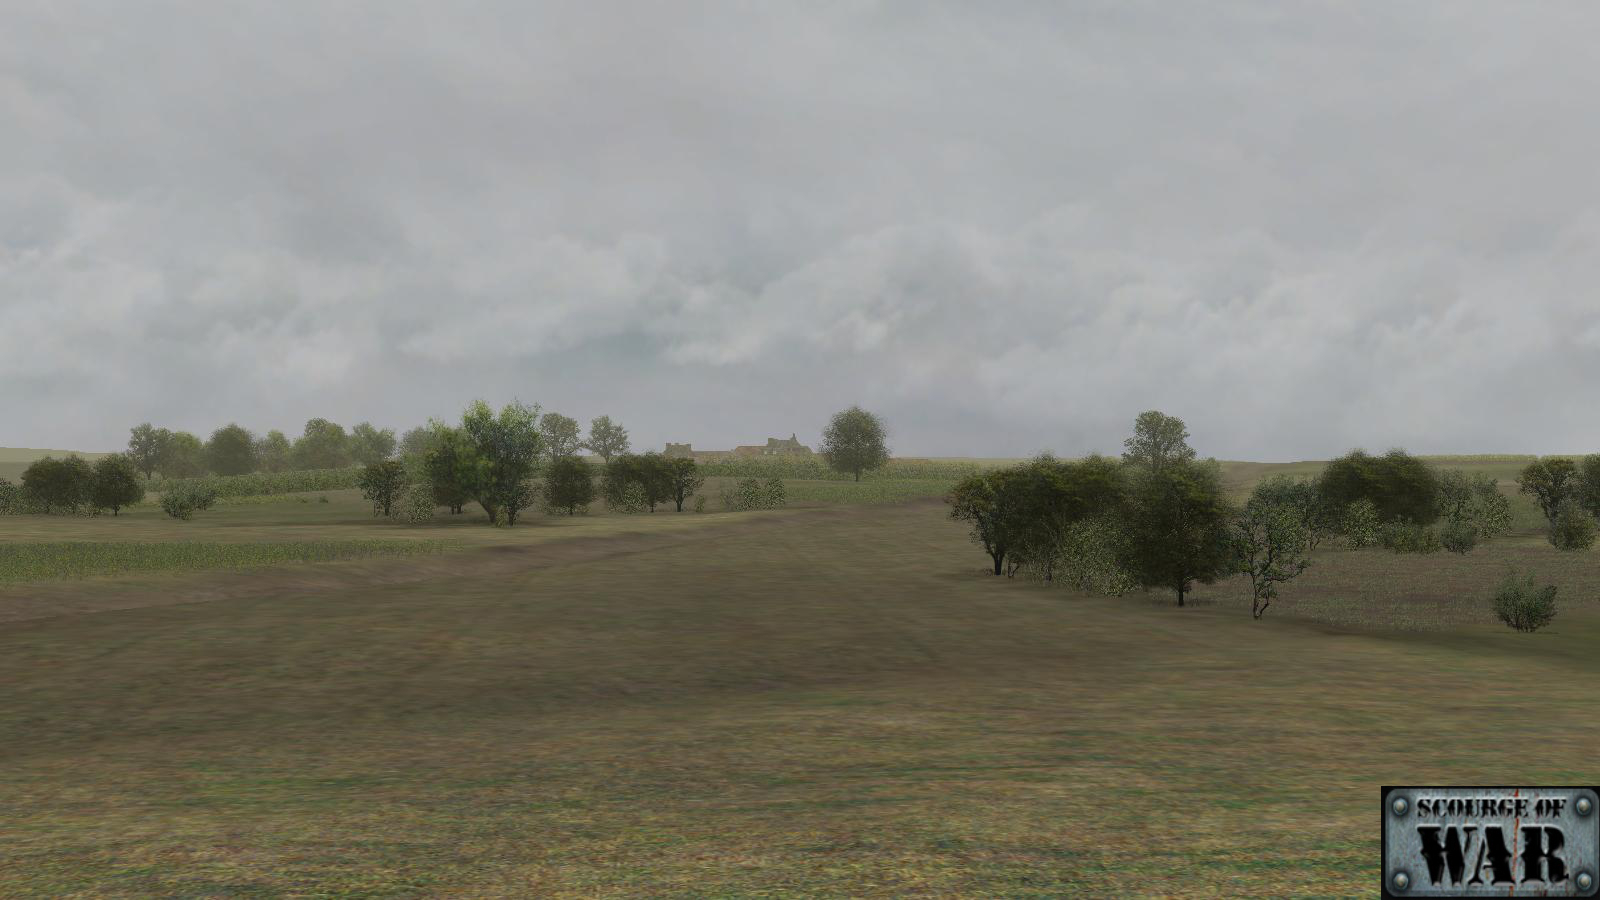
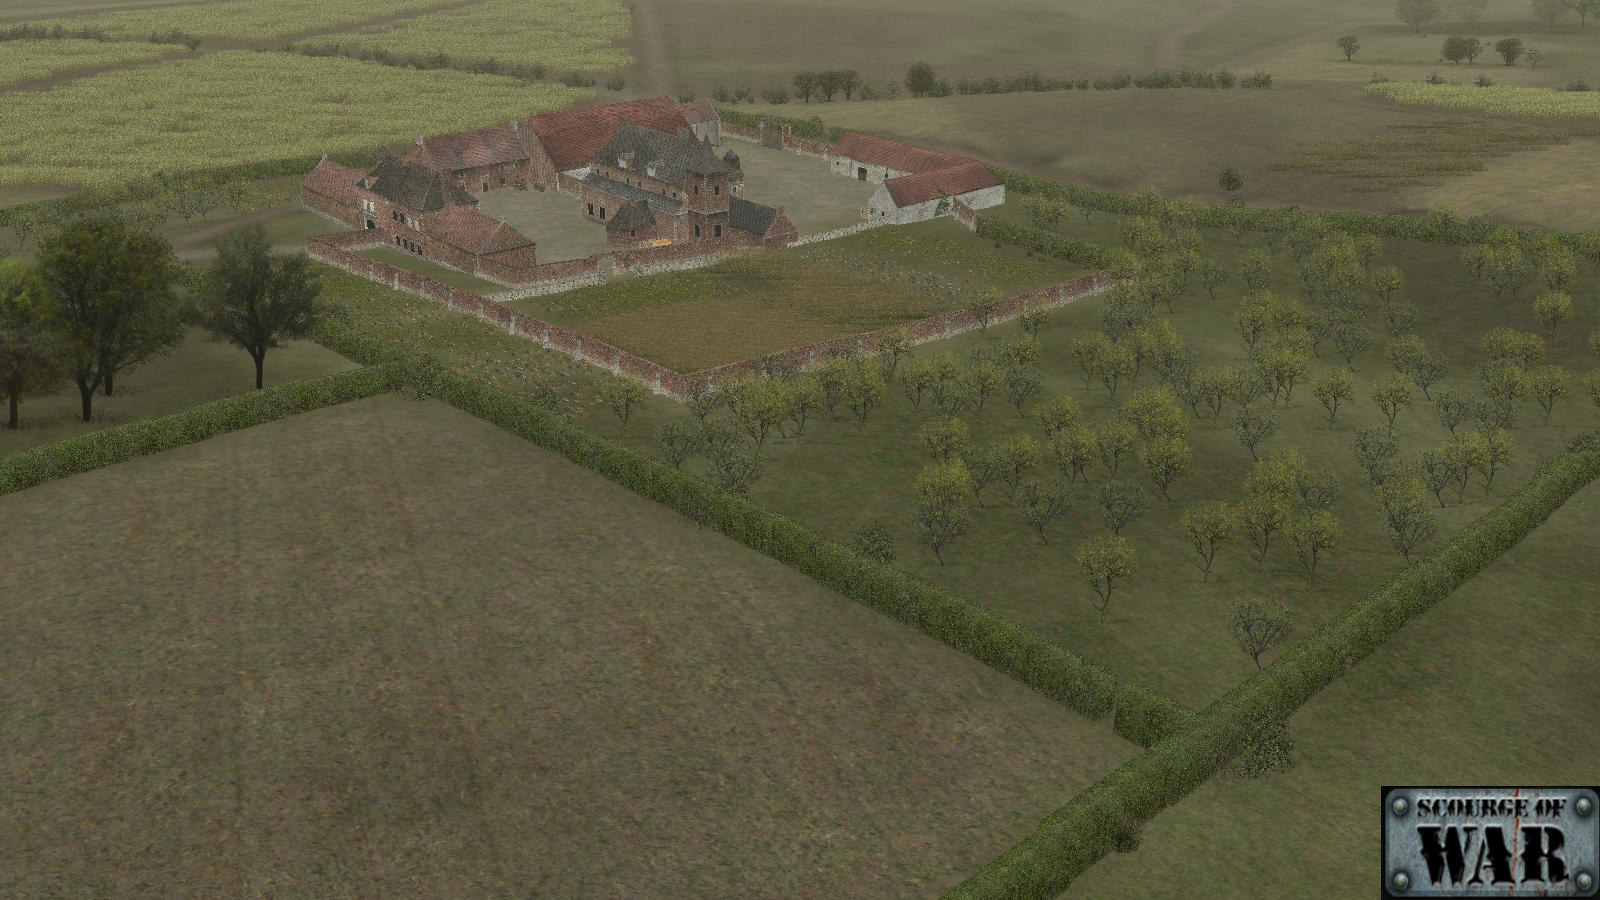
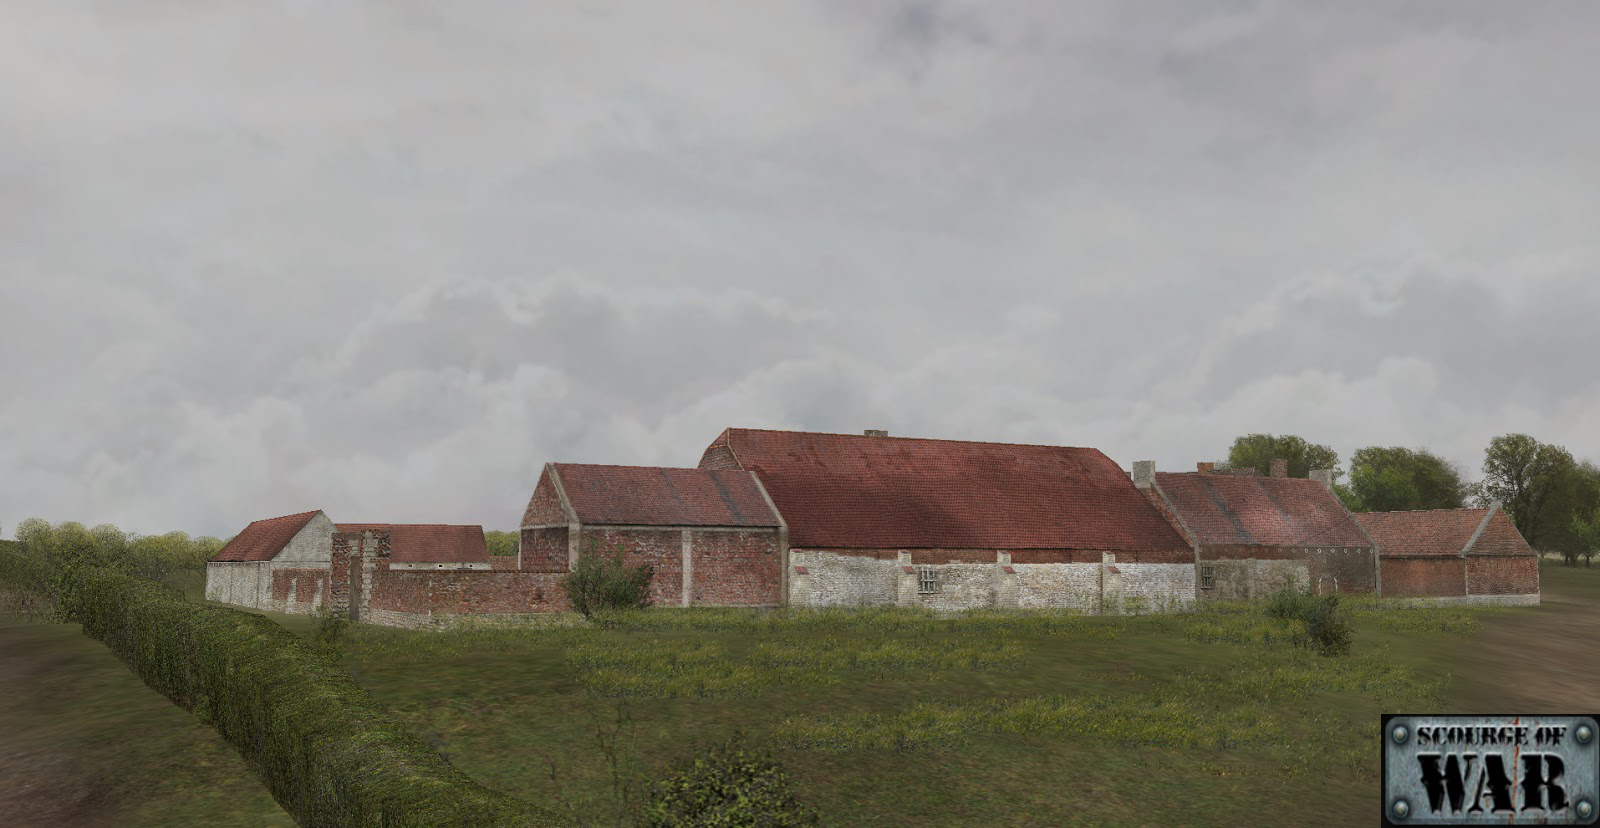
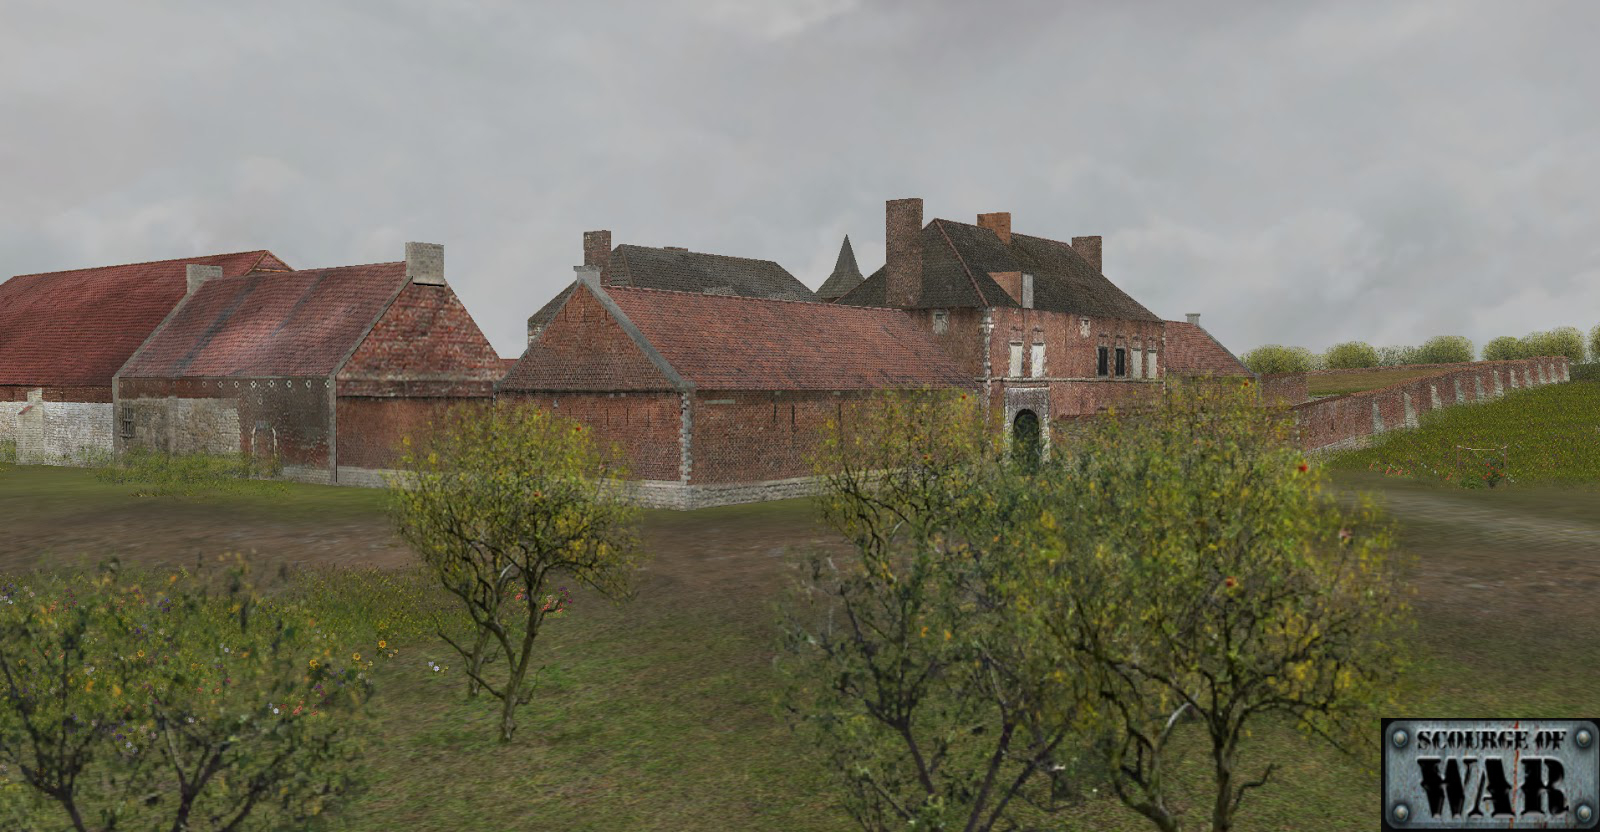
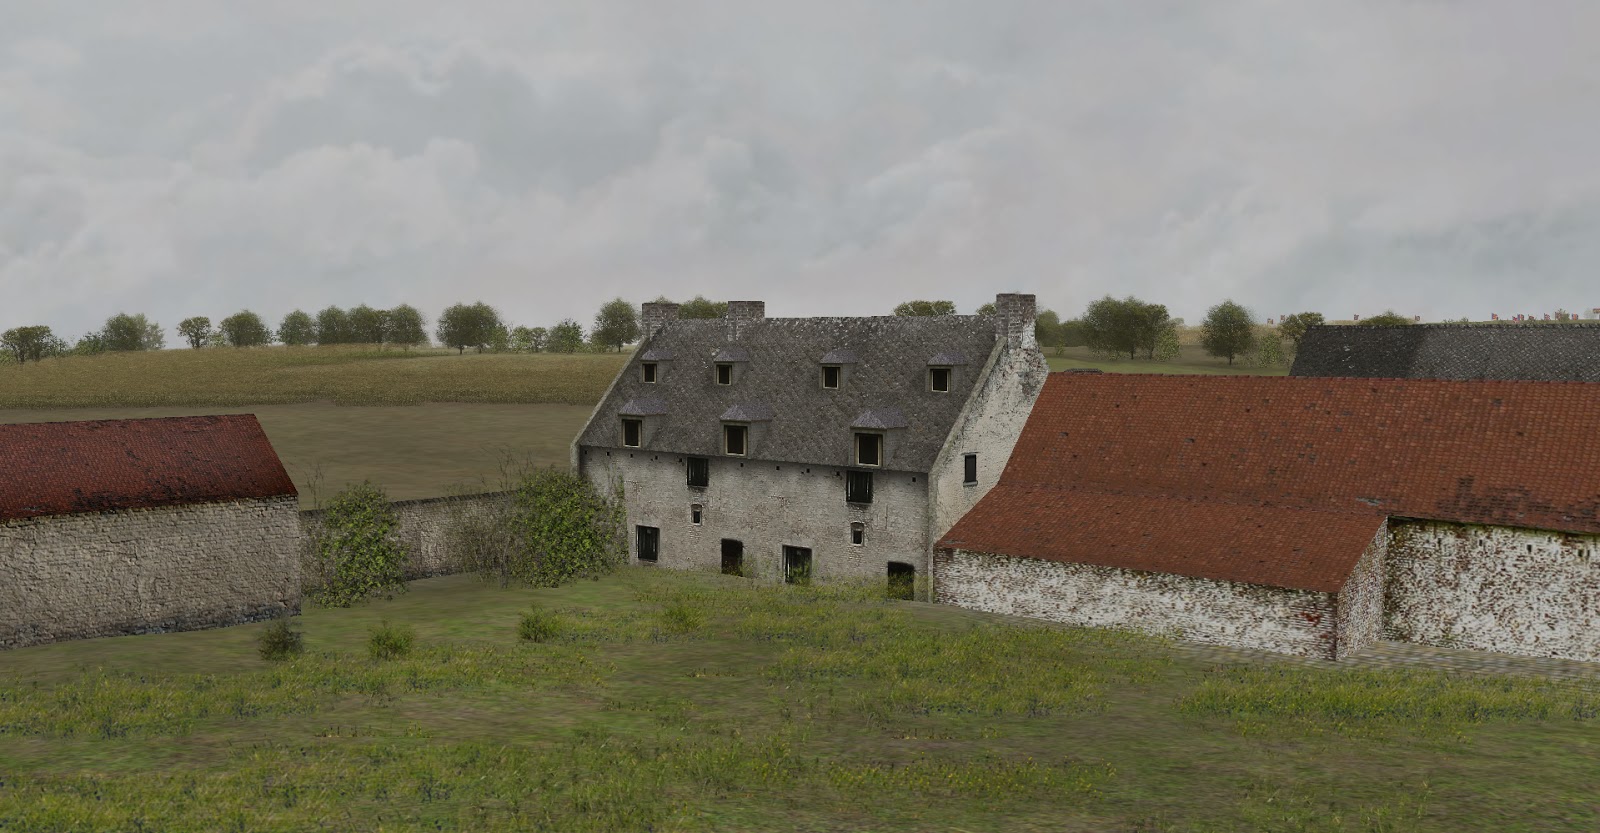
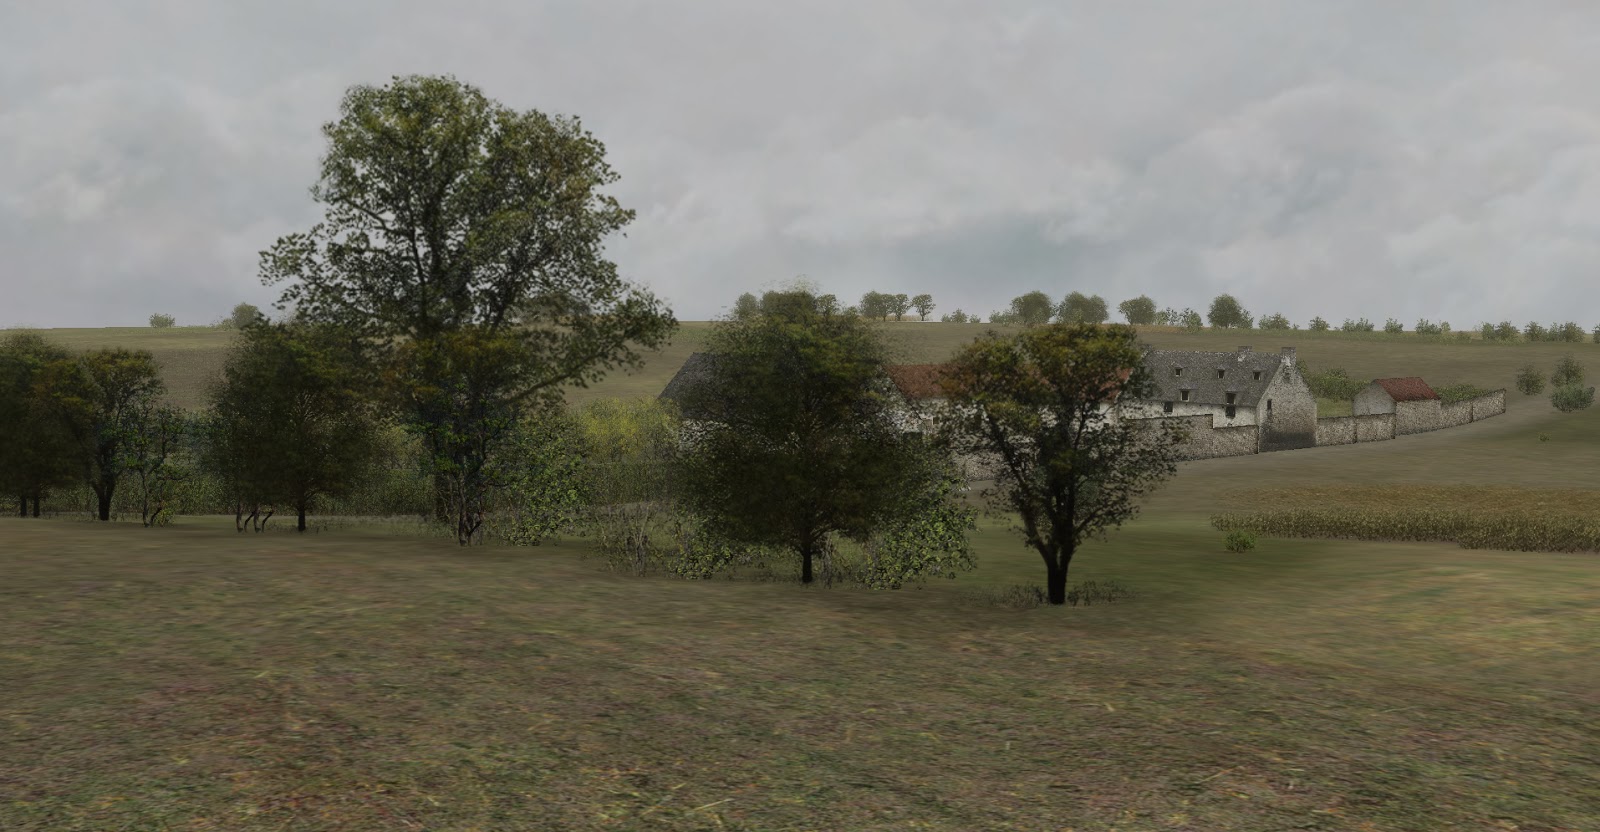
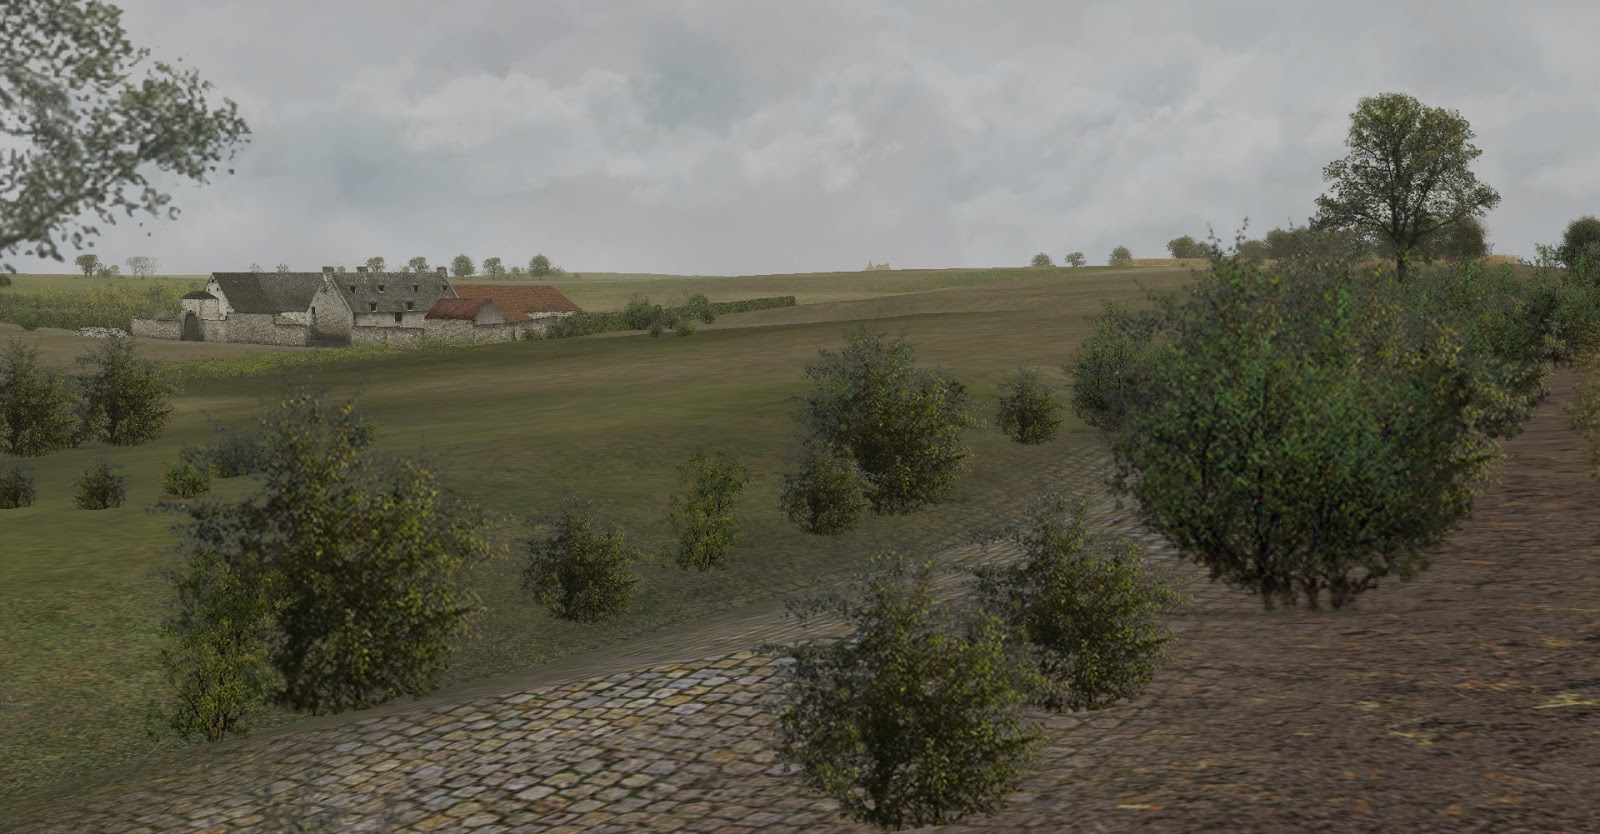
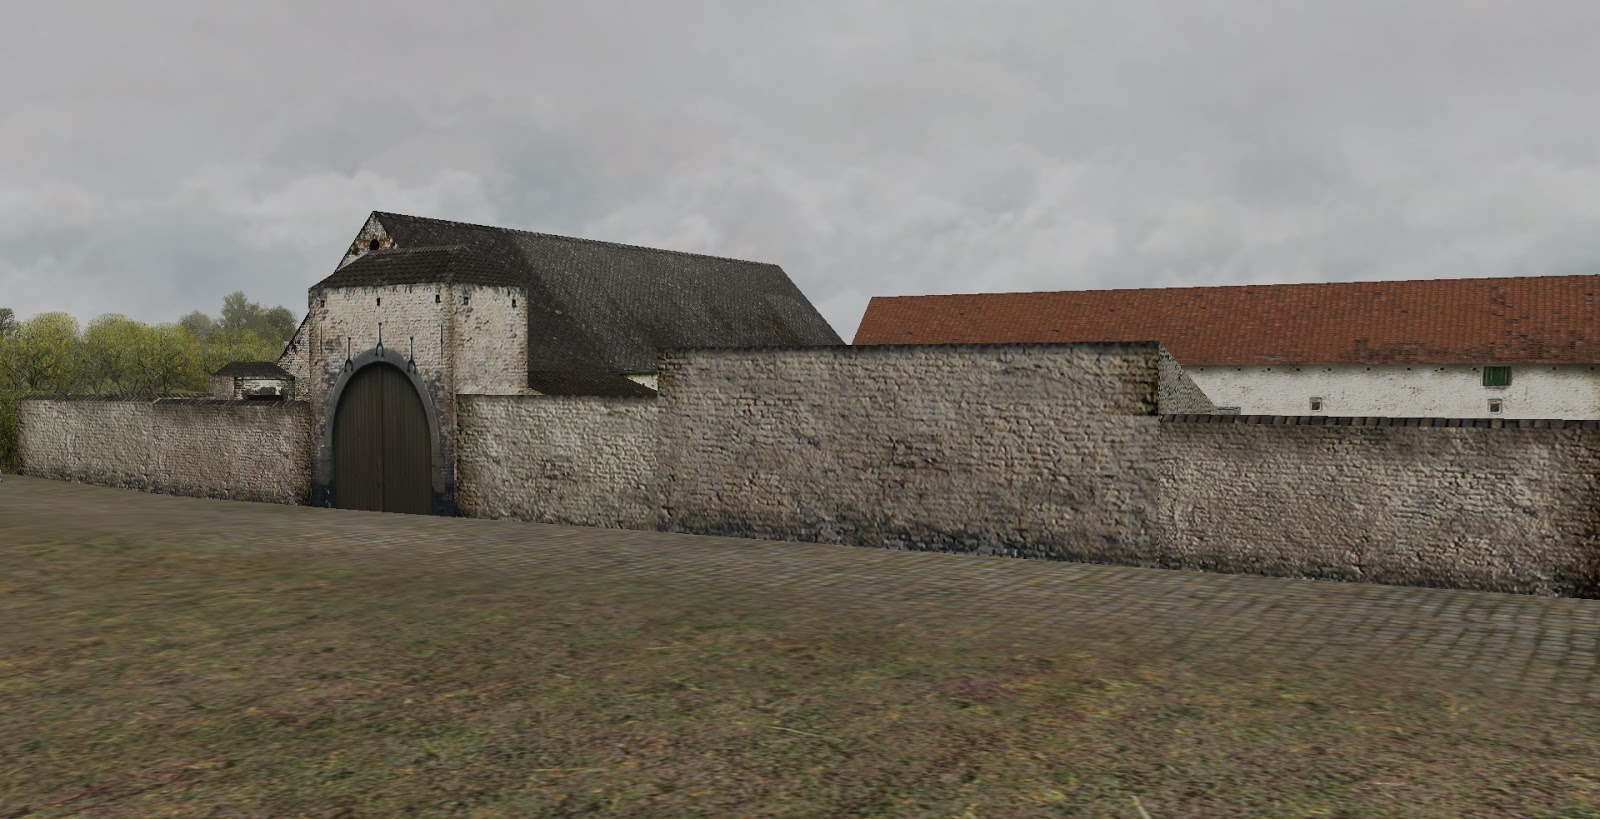
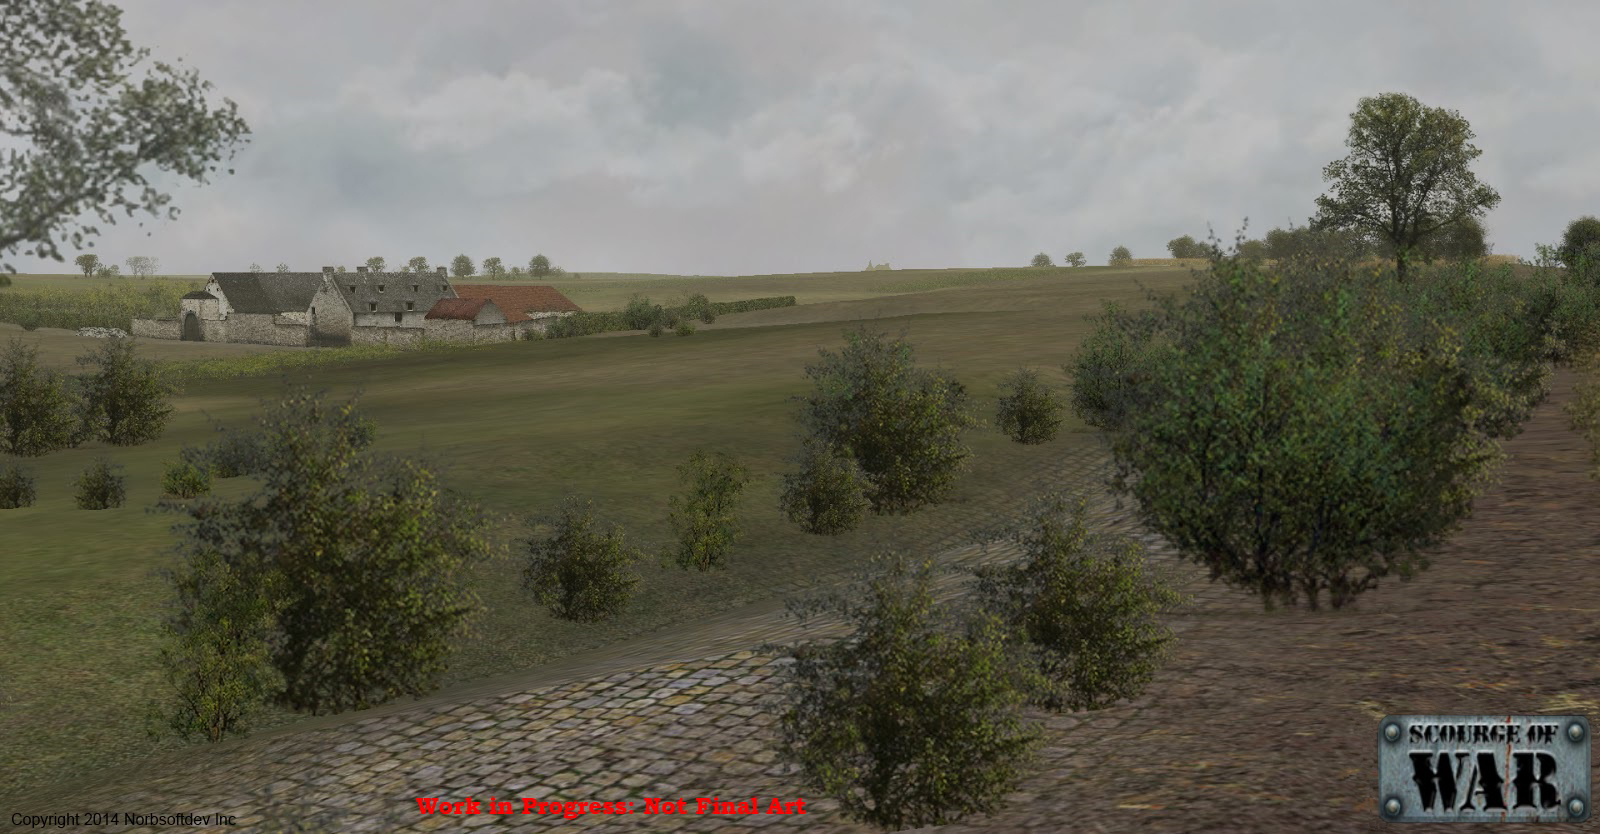
Nuove immagini di Scourge of War Waterloo
Rilasciate nuove immagini di Scourge of War Waterloo, stavolta si tratta di Hougoumont:
domenica 19 gennaio 2014
Hegemony - Rome : screenshots e trailer
Finalmente dopo tanto tempo notizie su Hegemony - Rome, seguito di Hegemony - Wars of Ancient Greece con screenshots e un trailer.
Qui potete trovare gli screenshots:
Battaglia con Scourge Napoleonic ieri sera
Altra bella battaglia ieri sera con Scourge of War con il napoleonic mod. Lo scenario era un attacco difesa con gli austriaci all'attacco. Le forze erano all'incirca della stessa dimensione.
Berthier e Io ci organizziamo per un attacco scaglionato: Berto fa una lunga marcia da ovest verso est per poi muovere verso nord con il fianco lungo il fiume, io partirò appena ricevuta conferma da lui si essere pronto ad attaccare, con una marcia diretta verso nord est.
La marcia e il collegamento riescono bene e sulla destra sembriamo anche prevalere per qualche tempo con un attacco congiunto, mentre sulla sinistra mi accontento di resistere. Ma la spinta non basta e alla fine veniamo ricacciati.
Qui allego il video dal mio punto di vista:
sabato 18 gennaio 2014
Scourge of War come usare al massimo l'AI
Ieri abbiamo fatto una prova di battaglia 1 contro 2 a Scourge (qui sotto il video del replay). Dallo scontro mi sono venuti in mente dei suggerimenti riguardo l'uso delle truppe e dell'AI.
Cominciamo dall'artiglieria: ho già detto nel tutorial che spesso per forzare le batterie ad avanzare è necessario disattivare l'AI del capitano d'artiglieria. A volte però non basta perchè l'AI del pezzo se sta sparando non sembra esegue con prontezza. In questi casi fatela facile, dite direttamente al pezzo dove andare (anche senza disattivare la sua AI). Può sembrare troppo da microgestione, ma i cannoni sono strumenti da usare con precisione (il terreno dove li metti influenza la loro efficacia) quindi vale la pena di fare lo sforzo.
Sempre riguardo l'artiglieria, ricordate sempre che il miglior uso è far puntare tutti i pezzi contro un singolo bersaglio alla volta.
Passiamo alla fanteria: se comandate un corpo di fanteria: date gli ordini a comandanti di divisione finchè vi muovete, ma poi passate ai comandanti di brigata quando si passa allo scontro: per avere un miglior controllo distaccate le brigate, almeno l'AI di divisione non interferirà sul vostro controllo. Per situazioni che richiedono una reazione più immediata date gli ordini anche ai singoli reggimenti.
In generale comunque la giusta combinazione di stance e punti di movimento vi permette di avere un ottimo controllo. Esempio: voglio un'azione offensiva forte verso un punto: do al comandante di brigata dove voglio che vada (oltre la linea nemica ad esempio) e poi setto la sua stance su "attack". Gradualmente lo vedrete spingere verso quella direzione: forse non con la premura o la precisione che vi piacerebbe, ma lo fa. Lo stesso vale per una manovra di arretramento, indicate un punto arretrato e settate una stance difensiva, e gradualmente ci sarà un movimento all'indietro.
venerdì 17 gennaio 2014
War Thunder Ground Forces
Ripercorrendo all'indietro i passi di World of Tanks, War Thunder passa dagli aerei ai carri armati. Graficamente bellissimo, peccato sia la solita solva.
mercoledì 15 gennaio 2014
Intervista Lock n Load: Heroes of Stalingrad
Su The Wargamer trovate un'intervista allo sviluppatore di Lock n Load: Heroes of Stalingrad, gioco Matrix di prossima uscita.
http://www.wargamer.com/article/3504/interview-lock-n-load-heroes-of-stalingrad
http://www.wargamer.com/article/3504/interview-lock-n-load-heroes-of-stalingrad
Uscito Conquest of Paradise prima espansione per Europa Universalis IV
E' stato rilasciato Conquest of Paradise la prima espansione per Europa Universalis IV; ecco il trailer di rilascio:
domenica 12 gennaio 2014
sabato 11 gennaio 2014
Battaglia HITS a Scourge 10.10.2014
Ieri scontro 2vs2 con Scourge in ambientazione ACW. Berthier ed io contro 2 amici di Kriegs. La mappa è Alpine, vale a dire una pianura tagliata in due da una grossa cresta di colline. La battaglia è un meeting engagement. Noi abbiamo una leggera superiorità numerica e abbiamo due fantastici reggimenti di shapshooters che hanno una velocità di fuoco impressionante, ma loro sono più vicini e sullo stesso lato della cresta dell'obbiettivo.
Mentre marciamo verso l'obbiettivo si butta giù una bozza di piano: assumo che l'avversario arriva da est come effettivamente avviene e dato che ho la divisione più grossa, la userò per bloccare la loro marcia verso l'obbiettivo mentre Berthier, si posiziona a difesa dell'obbiettivo, dove se pressato duramente mi ritirerò.
All'inizio non ero d'accordo sulla direzione di marcia di Berthier fuori dalla strada di una delle sue brigate (per un problema l'altra invece ha marciato lungo la strada con me) ma alla fine la cosa ha pagato perchè è arrivato nel punto giusto al momento giusto.
Immediatamente oltre la cresta vedo prima uno dei loro ufficiali e poi inizio a vedere le loro truppe. E' tardi per bloccarle in modo proprio, ma decido di prenderli in crisi di movimento. Comunico a Berthier cosa succede e gli dico di andare all'obbiettivo, mentre faccio un movimento di avanzata diagonale con le brigate per intercettarli: in realtà come scoprirò più tardi dal replay, le truppe nemiche sono avanzate in due colonne e io ho visto solo la più vicina, mentre l'altra era già vicina all'obbiettivo anche se erano mal posizionate.
Devo comunque averli presi in contropiede perchè la mia prima brigata fa un'ottima partenza e blocca la colonna nemica più vicina. Avevo preventivato di tenere la seconda di riserva per legarmi a Berthier, e coprire la marcia di ricongiungimento della sua seconda brigata, ma vedo da lontano che il nemico combatte già con lui ma che le sue spalle (almeno dalla mia posizione) sembrano scoperte. Quindi mi gioco il tutto per tutto e butto la mia seconda brigata nel buco. In realtà ci sono più truppe nemiche di quanto penso oltre la mia visuale, ma con il supporto degli sharpshooters di Berthier riusciamo a prendere nel mezzo 3 o 4 reggimenti nemici, che riusciamo a distruggere. A questo punto Berthier è libero di pressare progressivamente verso est, mentre la mia prima brigata riesce a tenere bloccate forze nemiche superiori per parecchio tempo e anche molto bene (anche perchè i loro attacchi mi sembrano scoordinati). Il resto lo potete vedere dal video: il nemico è tagliato in due e viene sospinto indietro, finchè rompono il contatto e fuggono.
Questo il video del replay strategico:
E questa la visuale dal campo di battaglia:
Annunciato Scourge of War Waterloo
E vai, finalmente è stata annunciata la prossima incarnazione del motore di Scourge of War: Scourge of War Waterloo. Finalmente seguendo la grande richiesta dei fans il motore muoverà dai campi della guerra civile a quelli europei di 50 anni prima.
Il gioco è stato annunciato durante un podcast live con il blog The Strategy Wargamer, che potete rivedere qui:
Il gioco è stato annunciato durante un podcast live con il blog The Strategy Wargamer, che potete rivedere qui:
Lo sto guardando adesso io stesso (non che capisca moltissimo dei dettagli, ma ancora non sono arrivato ai punti topici).
Comunque fantastico, sul sito è già apparsa un'immagine di La Haye Sainte
mercoledì 8 gennaio 2014
WARGAME RED DRAGON: TEASER
Rilasciato il primo video teaser per Wargame Red Dragon. Come i precedenti graficamente è impressionante.
lunedì 6 gennaio 2014
Altri due video con Scourge of War
Il primo è la visuale strategica della partita di Sabato:
Per la discussione sulla battaglia andate qua: http://www.realtimestrategy.it/viewtopic.php?p=116951#p116951
Questa invece è la visuale dal terreno della battaglia di ieri sera:
Per la discussione sulla battaglia andate qua: http://www.realtimestrategy.it/viewtopic.php?p=116951#p116951
Questa invece è la visuale dal terreno della battaglia di ieri sera:
domenica 5 gennaio 2014
Film di Guerra Il battaglione perduto
E' un fil che non si vede molto spesso ed è sulla Prima Guerra Mondiale; un po' retorico ma si lascia guardare.
sabato 4 gennaio 2014
Scourge of War - Battaglia HITS a Prairie Grove
Nuova battaglia multiplayer ieri sera con i ragazzi di Kriegs e Berthier. Per la prima volta abbiamo usato il mod di Prairie Grove ( http://en.wikipedia.org/wiki/Battle_of_Prairie_Grove ). Bellissima mappa ma se l'Arkansas è così penso non ci andrò mai in vacanza.
Noi confederati dobbiamo tenere il guado sul fiume sgombro contro l'attacco nordista. Mando la brigata di Hays a sud sud est dell'obbiettivo e quella di Berthier a nord nord-ovest. La mia brigata AI resta indietro per ogni evenienza. Caso vuole che entrambi siano attaccati allo stesso tempo, ma mentre l'avversario di Berthier è aggressivo oltre che numericamente superiore, quello contro Hays sembra non voler spingere e dopo i primi canister dei cannoni che avevo mosso a supporto diretto si limita a schermagliare (solo dal replay vedrò poi quanto numericamente fosse superiore a Hays. Quindi un po' d'azzardo, muovo la brigata AI a supporto di Berthier e una batteria sul fianco dell'avversario per prenderlo d'infilata. Stavolta è lui a trovarsi in inferiorità numerica e per non dargli respiro, metto la brigata AI nella stance "attack" dandogli una zona di movimento oltre l'avversario. Lo ricaccia indietro e gli fa male, intanto Berthier torna al centro per far riposare le truppe e formare una riserva. Intercetto messaggi in cui il comandante a sud viene spronato ad attaccare dato che dovrebbe essere in superiorità numerica e che le sue truppe sono disfatte e devono riformarsi: un'utile informazione. A questo punto, rimetto la brigata AI in "hold to the last" e gli do come nuova zona il fianco del nemico a sud, che alla fine inizia a premere Hays sui fianchi. Quindi a questo punto la situazione si ripete a sud, prendiamo l'avversario in superiorità e lo ributtiamo indietro.
Da questo punto in avanti è una sequenza di loro tentativi di organizzare attacchi, mentre noi continuiamo a fare un gioco di turnover fra fronte e riserve. Alla fine organizzano un attacco frontale, ma sono respinti da Hays e Berto, mentre io lancio la brigata AI all'attacco proprio nella fase finale.
Insomma questa partita è un'ottima dimostrazione dell'importanza di avere riserve fresche, far riposare le truppe quando possibile, gestire le batterie al meglio dando il massimo campo di tiro e saper usare le stance per passare da difensivo ad aggressivo e indietro quando necessario.
Articolo storico su The Wargamer Melvin the Giant Killer
Su The Wargamer trovate un articolo storico sulla cacciatorpediniere Melvin che durante la battaglia di Leyte del 1944, silurò e affondò la corazzata giapponese Fuso.
http://www.wargamer.com/article/3497/historical-article-melvin-the-giant-killer
http://www.wargamer.com/article/3497/historical-article-melvin-the-giant-killer
mercoledì 1 gennaio 2014
Black Hawk Down: La Vera Storia
Documentario di History Channel sul soggetto del film Black Hawk Down
Ricordo che l'autore del libro da cui è tratta il film, l'autore sostiene che gli Italiani illuminavano le zone per facilitare i guerriglieri somali. Ovviamente le prove di questo fatto stanno a zero, ma dati i rapporti tesi tra il comando italiano e quello americano all'epoca ogni paranoia trovava supporto.
Ricordo che l'autore del libro da cui è tratta il film, l'autore sostiene che gli Italiani illuminavano le zone per facilitare i guerriglieri somali. Ovviamente le prove di questo fatto stanno a zero, ma dati i rapporti tesi tra il comando italiano e quello americano all'epoca ogni paranoia trovava supporto.
Iscriviti a:
Post (Atom)